
Display Controls: Icons
Icons enable users to differentiate between different kinds of locations within a network. They can also help make locations more distinguishable against the map background.

Icons
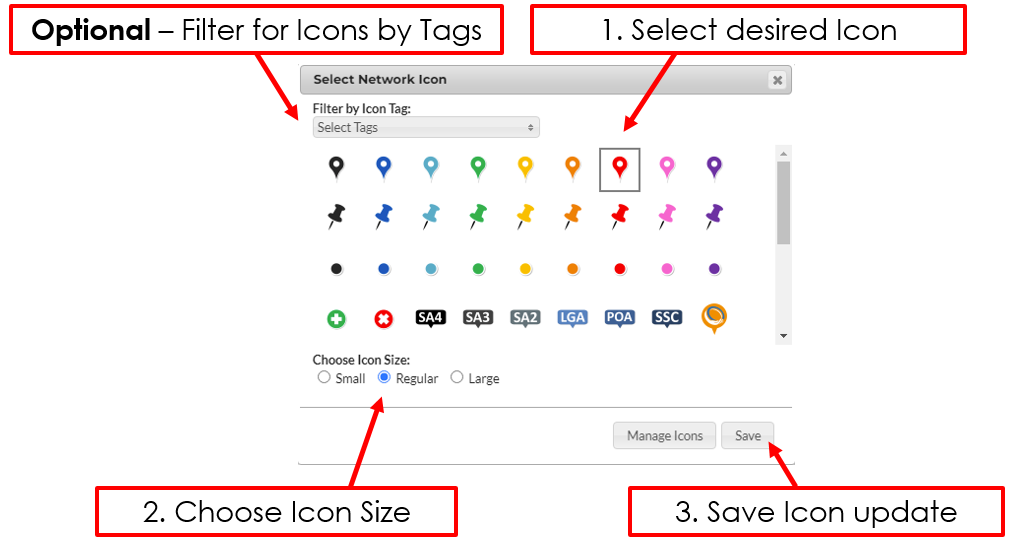
To change the icon for all locations, select “Icon” under “Display Controls”. This will open a popup which includes the system's default pins and any others loaded by users within the company. To set an Icon:
Select desired Icon image. If a custom icon has been uploaded with a tag it can be easily found by filtering for the Icon using “Select Tags” drop down.
Choose desired size of the Icon.
Hit “Save”
Manage Icons - Upload a Custom Icon
Custom Icons can be uploaded to help make the network more interpretable. Custom Icons consist of uploaded images to display on the location. There are three steps to this process:
Download the Template
Create Icon
Upload Icon into Explorer
1. Download the Template
Download the PowerPoint below, this consists of two available templates to choose from a “Word Icon” and an “Image Icon”. Word icons are a quick and easy way of creating an icon, and involve only typing in an abbreviated version of what the icon represents. Image icons require resizing an image and ensuring the image size for the custom icon remains below 50Kb.
2. Creating the Icon - Word or Image Template


In creating the custom icon, keep in mind the image size must be less than 50Kb.
3. Uploading the Icon into Explorer
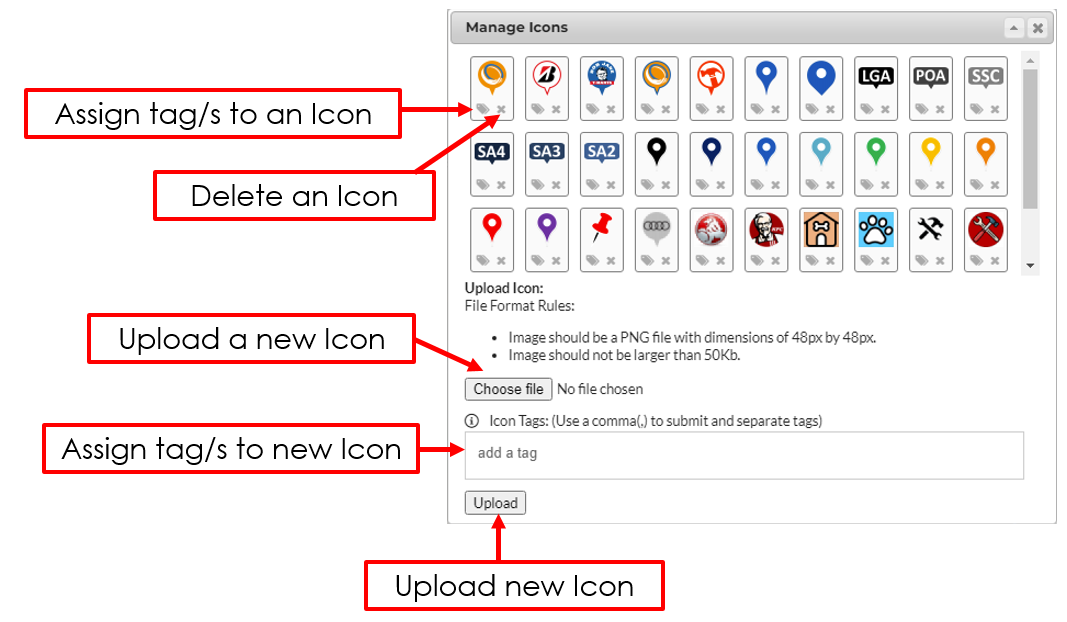
To upload the created custom Icon into the explorer:
Select “Icon” under “Display Controls”
Select “Manage Icons”.
Select “Choose File” and select the custom Icon created.
Optional - Assign a Tag to the Icon uploaded. This can help users search for the created Icon easier after creating it.
Hit upload.